If you are marketing and selling products you will know that having a clear and concise message is key. This applies to your photography which should feature images to accurately convey what you are offering potential customers.
Consumers are inundated with imagery through smartphones, tablets and striking visual advertising wherever they go. To get noticed, it is more important than ever to have photography which stands out from the crowd.
Read on to find out how to make sure that your products are photographed properly and to get images that will really work for you and your business.
Increase the Clarity of Your Product Photography
Clean highlights achieved using a pair of slim studio flash diffusers
At a very basic level, you are trying to capture the cleanest and clearest product photography. The easiest way is to place the item on a large white paper roll to reduce reflections. The roll is typically 1m+ wide and 10m long and suspended from above. This allows you to easily cut the object out of the image using Photoshop and replace the background with a solid colour.
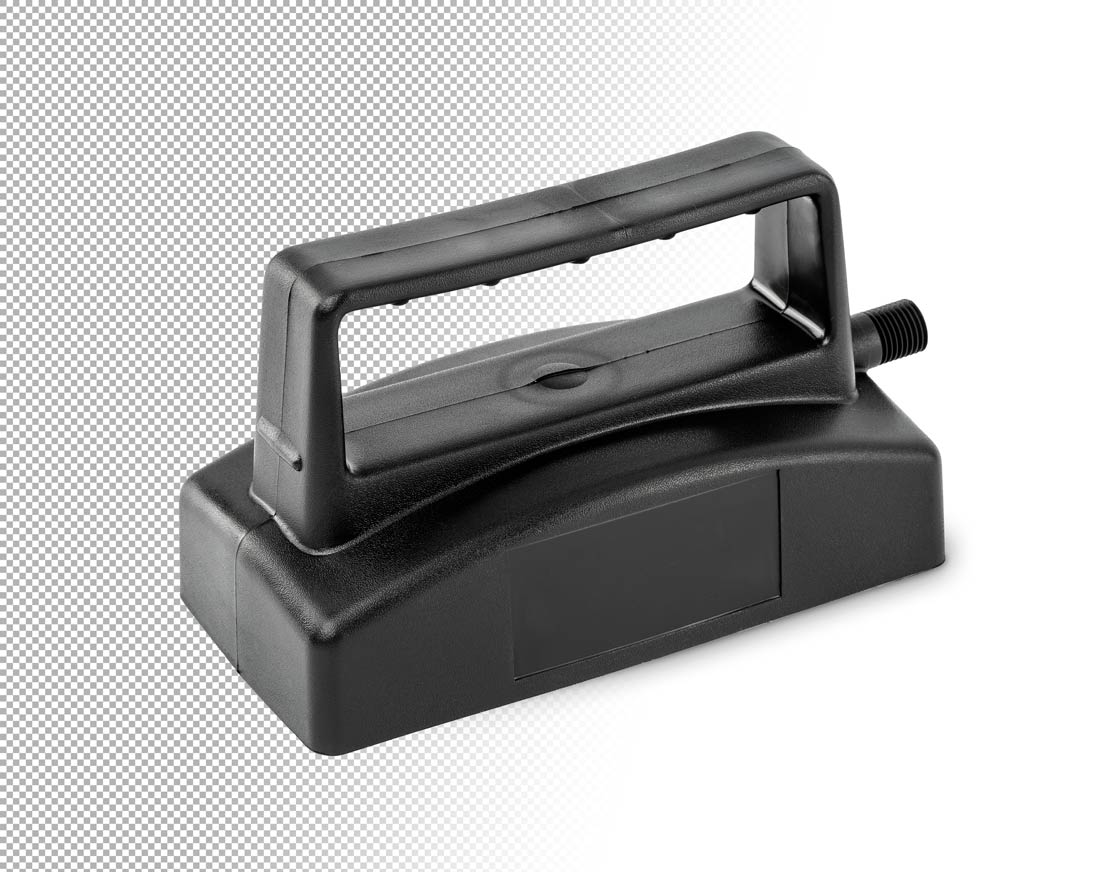
Small spare part shown cut out against a transparent background with and without shadow
This is a highly effective method and a widely used industry standard. The solid background means there is nothing to interfere with the product and shows the consumer exactly what they are buying. This can reduce return rates and improve customer satisfaction.
Product Photography and Reflective Surfaces
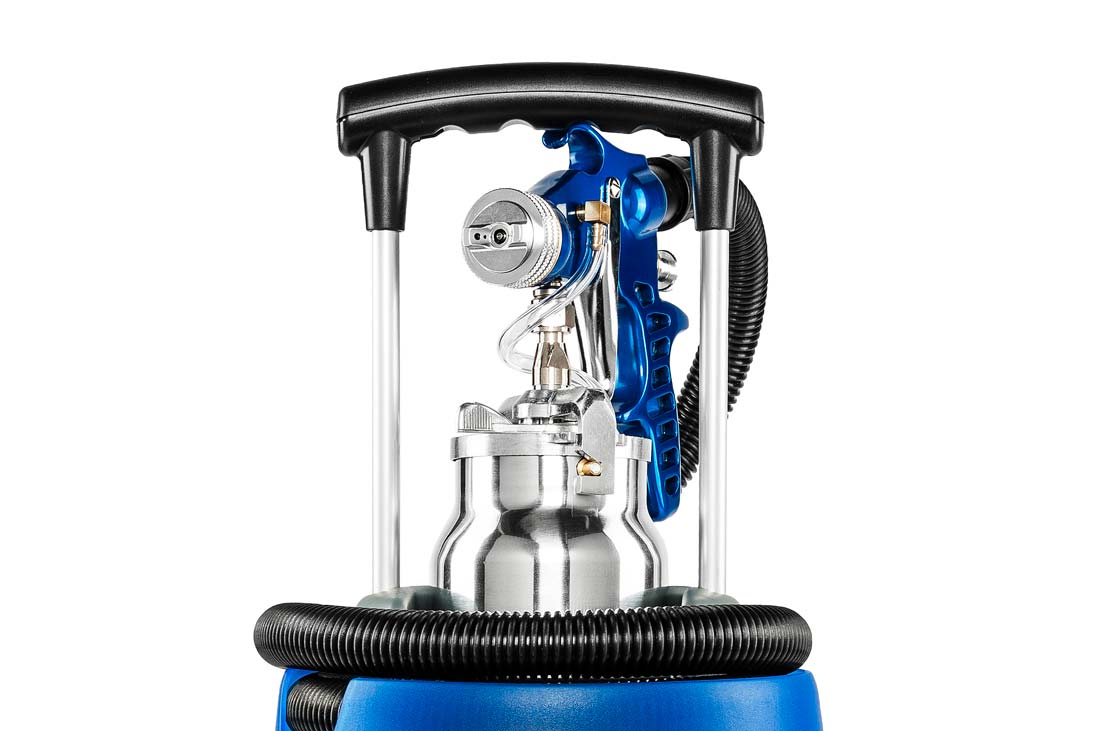
Bright, chrome surfaces need to be cleverly blocked off using a variety of techniques
Pay close attention to any reflective surfaces on the product. For shiny/polished/chrome objects the product is only half the story – the other half is the surroundings that the object is reflecting. It is important not to let light fall on things you do not want reflected on the product, e.g. tripods, light stands, the camera and photographer. For small products, depending on the reflection you want, the solution is to use large white or black foamboard sheets positioned close to the object.
You can also extend the white paper that the product is sitting on right up to the bottom side of the camera lens – this removes any hard edge reflections on the front of the reflective parts.
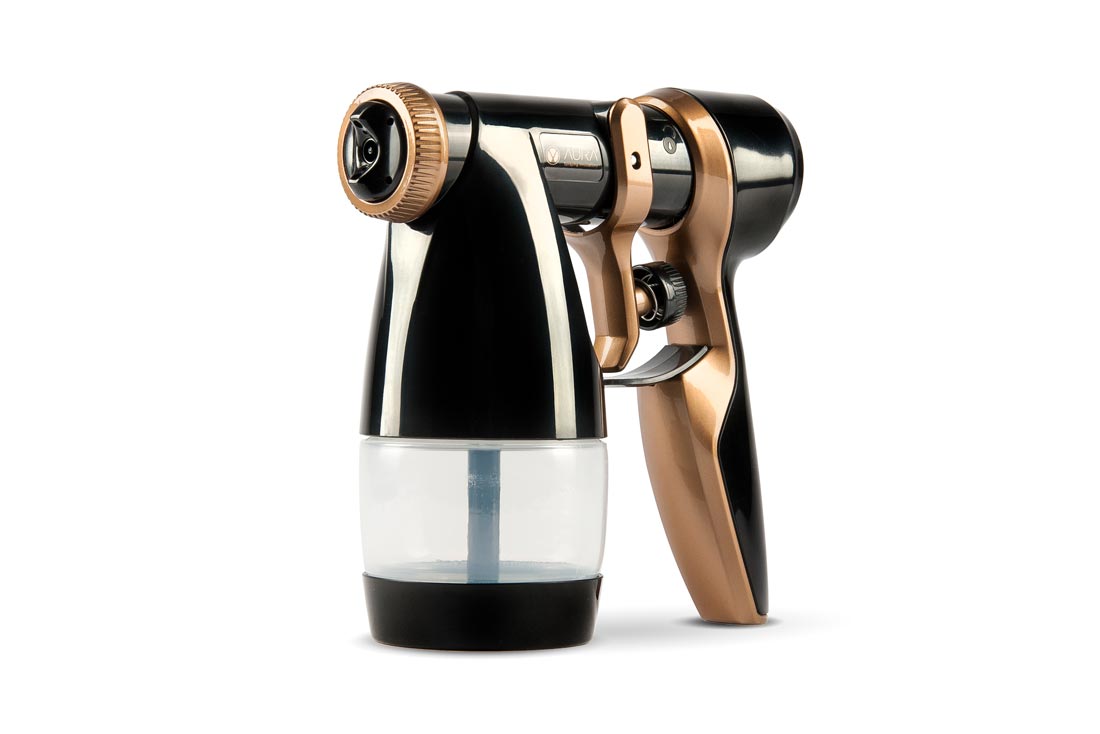
Show Products in Real-World Backgrounds


While it shows off your product, a solid background does little to stir any emotion in the viewer. This is where real-world backgrounds can take your products to the next level. There is a lot more to think about, such as the surface and surroundings, set dressing, more complicated lighting setups etc. Using images like these, the customer can relate to the product and get a better understanding of its functions.
Apply Usage Photography to Demonstrate Your Product

Clean, bright usage photographs inform customers of key applications
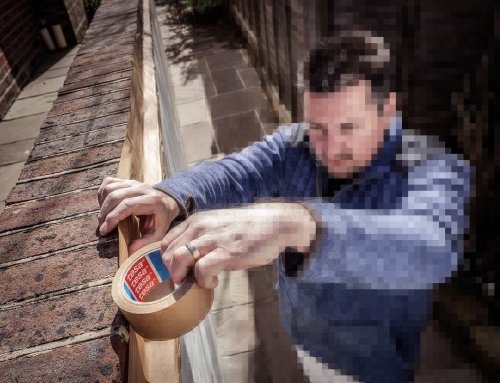
If applicable, you can bring the human element into your images with usage photography. This is where the product is demonstrated in a realistic setting to show its key features. By having a person using the product it makes it more relatable to the viewer and sets the expectations appropriate for the target audience.

At Demand Marketing we have been working with products for years so it is second nature for us to develop photography briefs with our customers. This will enable us to create product photography that highlights the features or conveys a message that appeals to the emotions of the viewer.
Carefully Prepare Your Products for Photography
Even if you are photographing a brand new product, ensure it is thoroughly cleaned. Remove any finger marks from polished surfaces and keep it is as dust free as possible. The smallest amount of dust can show up in product photography when reviewed on screen. Having more than one product to hand can also help in case of defects. It is best to work with your products while wearing thin, lint-free gloves to avoid creating any other marks that may appear in the photographs.
Get the Lighting Right
To get your product to jump off the screen or page will require some great lighting. You can use natural light, a flash or constant electric light. This could be soft light coming in from an open window or a complex arrangement of studio flashes so it is worth experimenting with what works best for your product.
A highly important part of photography is the white balance. This is where you tell your camera the kind of light conditions you are working in to produce images with the right colour. It is best to set this to a manual option so it does not change throughout your shoot. Refer to your camera’s user manual for how to set the white balance. You ideally want to keep all light sources matching the main light source. If your main light source is an open window it is possible to buy daylight matched light bulbs if you are using extra electric light. If you are using all electric lighting then keep all lights the same bulb type to avoid colour mismatch (tungsten, halogen, LED, fluorescent etc), if not you risk having parts of the image appear too blue or too orange as they don’t match the white balance of the camera. The obvious exception here is if you decide to use different coloured lights for creative effects (creative lighting techniques with colour gels etc.)
If you choose a tabletop next to a large open window, the sun-light will either need to come through a diffuser (large sheet of thin paper, baking paper or a non-blackout blind) or preferably not receive direct sunlight at all. Because you have one large source of light off to one side, the light will need to be bounced back onto your product so that it doesn’t have large, dark under-exposed areas. This is easy to achieve with large pieces of foamboard (you could use card but for the weight and rigidity, foamboard is a better choice) which you will need to prop up securely.
Achieve Consistent Lighting with Electric Light
Natural light is liable to change at any time. The industry standard for product photography is to use strobe flash lighting.
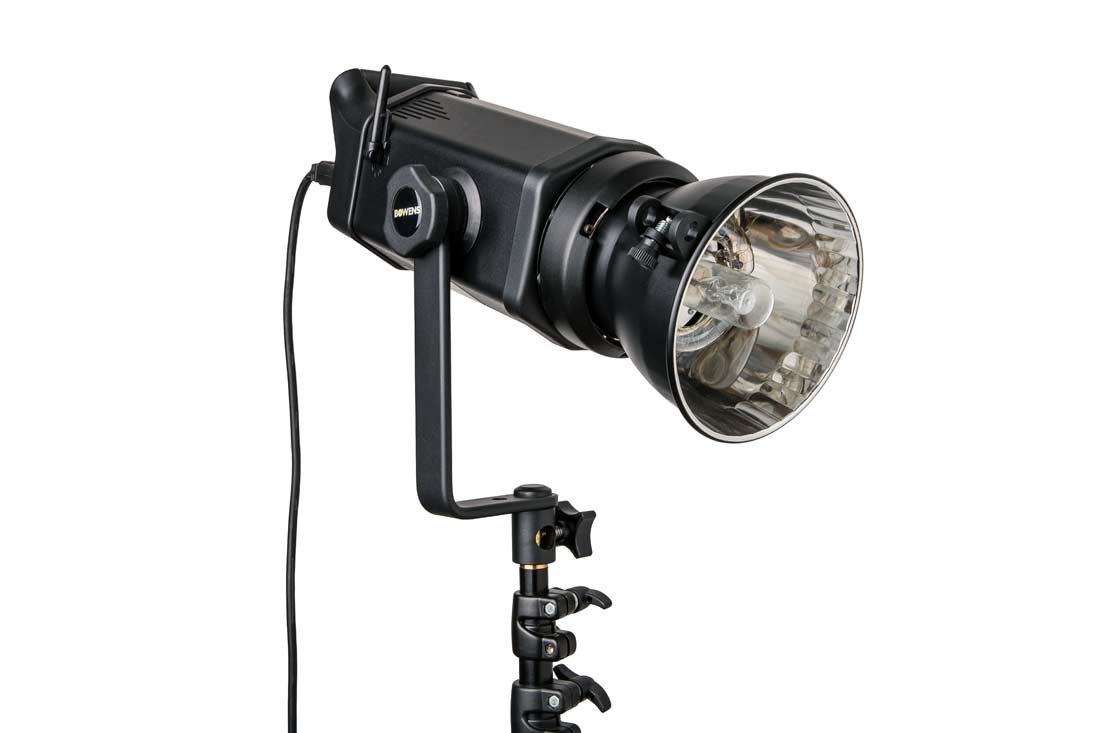
These lights are capable of putting out the exact same light, flash after flash, meaning you have consistent results while working with your products, instead of having to make constant adjustments as the sun goes in and out of the clouds.
Using strobe flash lights gives you other major advantages – you can now move your light sources wherever you want. It is worth using the modelling light if possible, this will provide a constant light so you can check the highlights and shadows on the product in real time, rather than waiting for the flash to fire and checking the results. Experiment by moving the product and the lights around – you will notice that lights from different angles will highlight different parts of the products in surprising ways, potentially even creating images that you did not initially expect.
Stabilise Your Camera
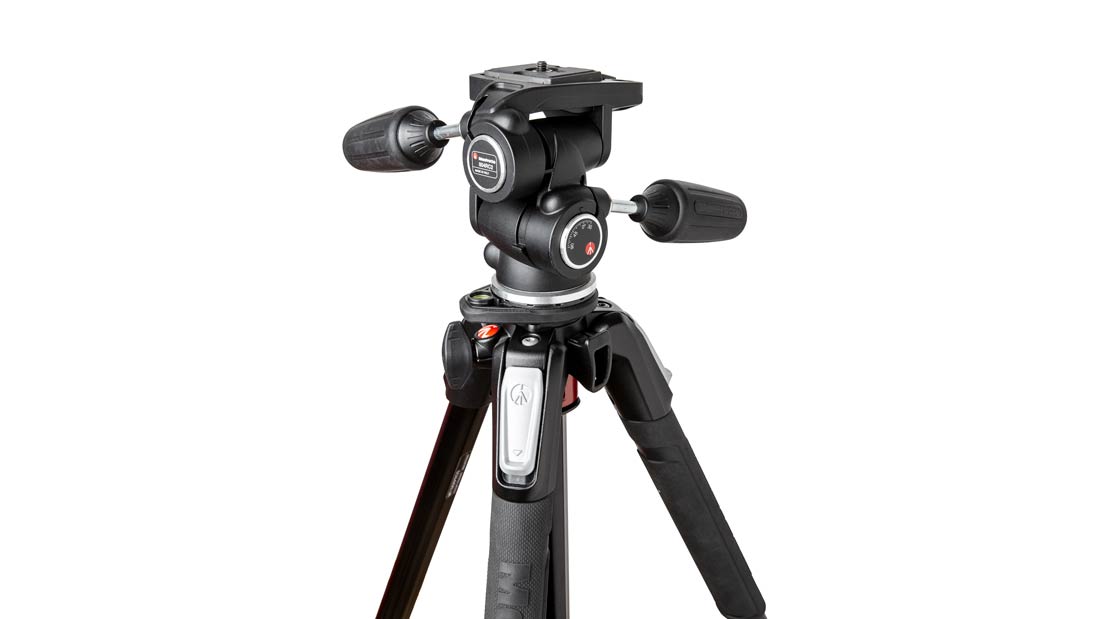
With all of these techniques, it is essential to use a tripod. This will keep consistency between images by having the camera at the same height from each product. It will also enable you to use the optimum settings for product photography with your ISO at or as close to IS100 as possible using an aperture of around f/11 to f/16. If using available light your exposure will vary depending on the amount of light available. If using studio flash lights then you will need to keep the exposure at 1/125th of a second.
Review the Images
Reviewing your images as you shoot will reduce post-production work. It is possible to zoom in on your images on the screen on the back of the camera but it rarely tells you everything you need to know and it is likely that something you don’t want will slip through. The best way to review your photography as you work is to tether your camera to a computer, you can even change the settings and release the shutter from the computer with some compatible cameras.
By bringing your images up on a large screen you can properly check your focus, exposure and check for areas of the product that may need an extra clean. It is much quicker and therefore more productive to check and clean the product while photographing it than to retouch dust and dirt out afterwards.
Retouch your Photographs
Being able to take your images into Photoshop gives you the ability to create visually perfect reproductions of your product. There may be marks left behind like a stray fingerprint, hairs, dust or other blemishes that can be quickly and easily removed with the Clone Stamp Tool in tandem with the Spot Healing Tool.
Optimise your images
Once you have photographed your products and retouched them on the computer, you are ready to share. If you are sharing your images online then read our blog post How to Optimise Website Photography.